
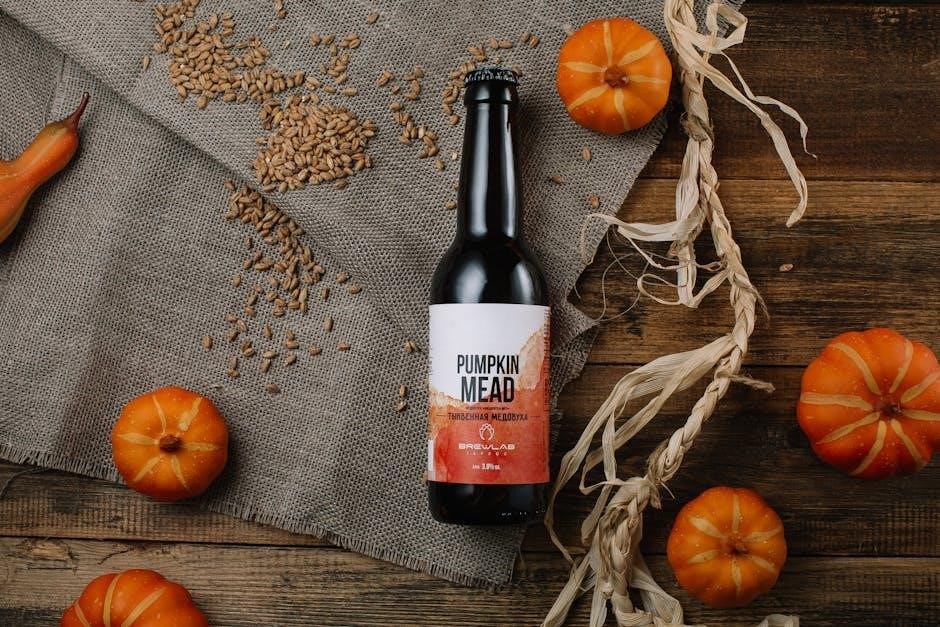
Crafting Your Own Brew: A Beginner’s Guide to Mead Making
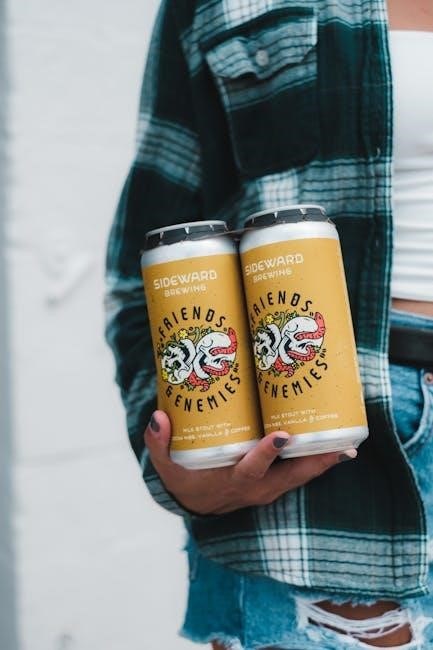
Embark on a delightful journey into the ancient art of mead making! This guide unveils the simplicity of crafting this honey-wine‚ a fermented beverage enjoyed for millennia.
Mead‚ often hailed as the “drink of the gods‚” boasts a rich history stretching back thousands of years. Predating wine and beer‚ this fermented beverage originates from a simple yet enchanting combination: honey and water. Throughout history‚ mead held significant cultural importance‚ celebrated in mythology‚ poetry‚ and royal feasts across diverse civilizations.
From the Vikings’ valiant halls to ancient Egyptian ceremonies‚ mead symbolized status‚ celebration‚ and even spiritual connection. Its versatility allowed for endless variations‚ incorporating fruits‚ spices‚ and herbs to create unique and flavorful profiles. Today‚ mead is experiencing a remarkable resurgence in popularity‚ captivating a new generation of brewers and enthusiasts.
This revival is fueled by its accessibility – mead making is surprisingly straightforward‚ requiring minimal equipment and readily available ingredients. Whether you’re a seasoned homebrewer or a curious beginner‚ crafting your own mead offers a rewarding experience‚ connecting you to a timeless tradition and the sweet nectar of the bees.
Historical Significance of Mead
Mead’s story is interwoven with the very fabric of human history‚ appearing in folklore and archaeological records across the globe. Evidence suggests mead production dates back to at least 7000 BC in Jiahu‚ China‚ and played a vital role in ancient cultures. In ancient Greece‚ mead was associated with poetry and inspiration‚ while the Norse revered it in Valhalla‚ the hall of fallen warriors.
Throughout medieval Europe‚ mead was a drink of royalty and nobility‚ often preferred over ale or wine due to its perceived health benefits and luxurious status. Monasteries also became centers of mead production‚ refining techniques and preserving traditions. The term “honeymoon” itself originates from the custom of gifting newlyweds with mead for a month following their wedding.
Despite a decline in popularity with the rise of other beverages‚ mead never fully disappeared. Today‚ a vibrant community of mead makers is revitalizing this ancient craft‚ honoring its heritage while exploring innovative flavors and techniques‚ ensuring its legacy continues for generations to come.
Understanding the Basic Ingredients
At its heart‚ mead is remarkably simple: just honey‚ water‚ and yeast. However‚ understanding the nuances of each ingredient is crucial for a successful brew. Honey provides the sugars that yeast converts into alcohol‚ dictating the final flavor profile. Water serves as the solvent and contributes to the overall body of the mead. Yeast‚ the microscopic workhorse‚ performs the fermentation‚ transforming sugars into alcohol and carbon dioxide.
While these three are essential‚ many mead makers incorporate additional ingredients like nutrients to support yeast health‚ fruits for melomels‚ spices for metheglins‚ or grains for braggots. The quality of each ingredient directly impacts the final product‚ so sourcing pure‚ high-quality components is paramount.
Mastering these foundational elements unlocks the potential for endless experimentation and customization‚ allowing you to craft meads tailored to your individual preferences.
The Role of Honey: Varieties and Quality
Honey is the soul of mead‚ profoundly influencing its flavor‚ aroma‚ and even color. Different floral sources yield distinct honey varieties – wildflower‚ orange blossom‚ buckwheat‚ and clover‚ each imparting unique characteristics. Lighter honeys generally produce cleaner‚ brighter meads‚ while darker honeys contribute bolder‚ more complex flavors.
Quality is paramount. Raw‚ unfiltered honey retains more of its natural enzymes and aromas‚ though pasteurization is acceptable. Avoid honey that’s been heavily processed or contains additives. The sugar content‚ measured in potential alcohol by volume (ABV)‚ dictates the final alcohol level.
Experimenting with single-varietal honeys or blends allows for incredible customization. Consider the desired mead style when selecting your honey; a delicate floral honey suits a light‚ refreshing mead‚ while a robust buckwheat honey complements a bolder‚ spicier brew;
Water Selection: Importance of Purity
Water constitutes the largest portion of mead‚ making its quality critically important. While seemingly simple‚ water significantly impacts the final flavor profile. Avoid using tap water directly‚ as chlorine and chloramine can create off-flavors‚ hindering fermentation and affecting the mead’s taste.
Spring water is a good option‚ but ensure it’s free from minerals that could negatively influence the fermentation process. Distilled or reverse osmosis (RO) water provides a neutral base‚ allowing the honey’s flavors to shine through. If using well water‚ have it tested for contaminants and adjust accordingly.
The mineral content of water can influence yeast health and nutrient availability. Adding yeast nutrients is often necessary‚ especially with purified water‚ to ensure a healthy and complete fermentation. Purity is key – the cleaner the water‚ the cleaner the mead!
Yeast Choices: Strains for Beginners
Selecting the right yeast is crucial for successful mead making‚ especially for newcomers. Different yeast strains contribute unique characteristics to the final product‚ influencing alcohol tolerance‚ flavor profiles‚ and fermentation speed. For beginners‚ opting for reliable and forgiving strains is recommended.
Lalvin K1-V1116 is a popular choice‚ known for its consistent performance‚ high alcohol tolerance‚ and clean fermentation. It produces a dry mead with minimal esters. Another excellent option is Lalvin D47‚ which enhances floral aromas and is suitable for sweeter meads.
Avoid wild yeasts initially‚ as they can lead to unpredictable results. Rehydrating dry yeast properly is essential for viability. Follow the manufacturer’s instructions carefully. Starting with a quality yeast strain significantly increases your chances of a successful and enjoyable first batch!
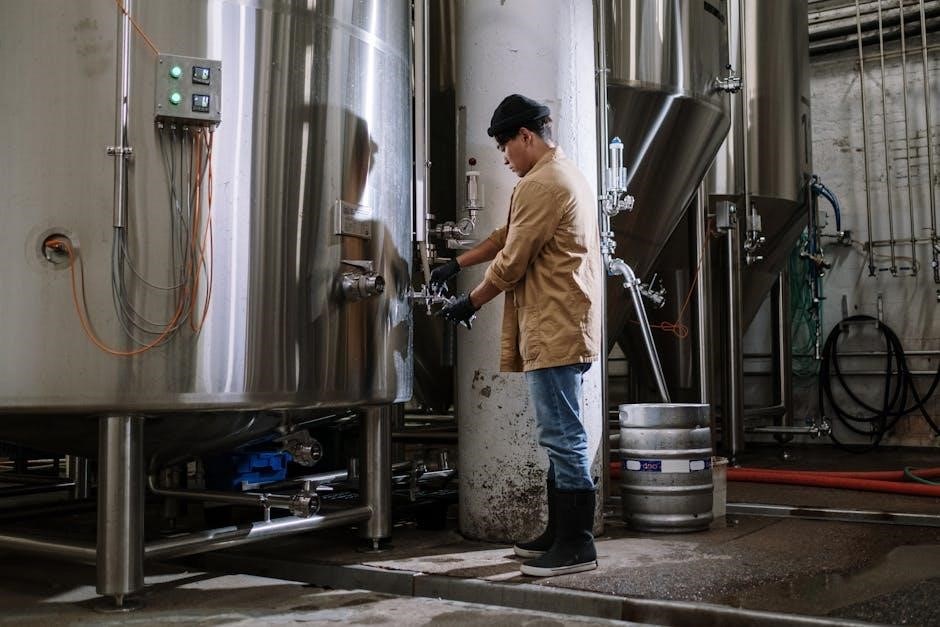
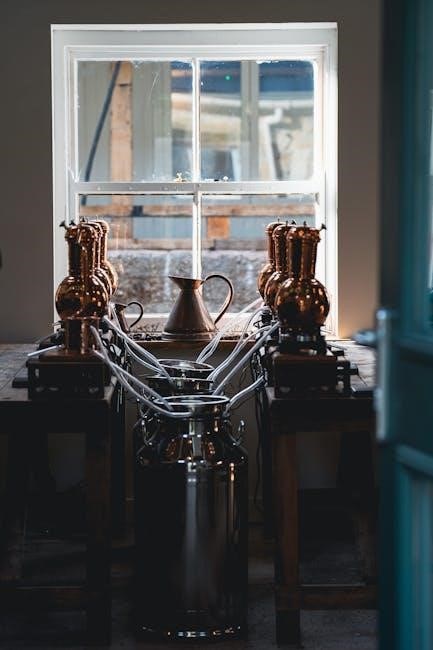
Essential Equipment for Mead Making
Embarking on your mead-making adventure requires a few key pieces of equipment. While the process is relatively simple‚ having the right tools ensures sanitation‚ accurate measurements‚ and controlled fermentation. Don’t worry‚ a substantial initial investment isn’t necessary – a basic setup is quite affordable.
You’ll need a fermentation vessel – either a glass carboy or a food-grade plastic bucket – with an airtight lid. Sanitization is paramount‚ so acquire a good quality sanitizer. A hydrometer is vital for measuring sugar levels and tracking fermentation progress. An airlock allows CO2 to escape while preventing oxygen from entering.
Bottles‚ a racking cane‚ and a stirring spoon complete the essential toolkit. Starting small with a one-gallon batch minimizes equipment costs. Remember‚ cleanliness is next to godliness in mead making!
Fermentation Vessels: Carboys and Buckets
Choosing the right fermentation vessel is a crucial first step. Both glass carboys and food-grade plastic buckets are popular choices‚ each with its own advantages. Carboys‚ typically made of glass‚ are non-porous‚ easy to sanitize thoroughly‚ and don’t impart any flavors to the mead. However‚ they are heavier and more prone to breakage.
Plastic buckets are lighter‚ more durable‚ and less expensive. Ensure the bucket is specifically designated for food-grade use to avoid unwanted chemical leaching. While easier to handle‚ plastic can be more challenging to sanitize completely and may harbor scratches where bacteria can grow.
For beginners‚ a one-gallon bucket is a cost-effective starting point. As you gain experience‚ carboys offer superior clarity and long-term storage benefits.
Sanitization Tools: Crucial for Success
Sanitation is paramount in mead making; wild yeasts and bacteria can ruin your batch. Invest in dedicated sanitizing solutions – avoid household cleaners! Star San and Iodophor are popular‚ no-rinse options‚ effective against a broad spectrum of microorganisms. A spray bottle is essential for applying sanitizer to all equipment that will contact the mead.
You’ll also need a good brush for cleaning carboys and buckets‚ reaching all surfaces. Bottle brushes are vital for sanitizing bottles before bottling. Don’t forget a thermometer to ensure proper sanitizer concentration. Always follow the manufacturer’s instructions for dilution and contact time.
Remember‚ sanitizing isn’t the same as cleaning. Clean first to remove visible debris‚ then sanitize!
Hydrometers and Air Locks: Monitoring Fermentation
Tracking fermentation is key to successful mead making. A hydrometer measures the specific gravity of the must‚ indicating sugar content and alcohol potential. Take initial and final gravity readings to calculate the alcohol by volume (ABV). Consistent readings signal fermentation completion.
Air locks are crucial for allowing CO2 to escape during fermentation while preventing oxygen and contaminants from entering. They come in S-shaped or three-piece designs‚ filled with sanitized water or sanitizer solution. Bubbling indicates active fermentation; slowing or stopping signifies completion.
Regularly monitor both hydrometer readings and airlock activity. These tools provide vital insights into the fermentation process‚ helping you ensure a clean and successful brew.
Step-by-Step: The Classic Mead Recipe (1 Gallon)
Let’s begin crafting your first batch of traditional mead! This recipe focuses on simplicity – honey‚ water‚ and yeast. First‚ meticulous sanitization is paramount. Thoroughly clean and sanitize all equipment to prevent unwanted bacteria. Next‚ prepare the must by combining 3 pounds of honey with enough water to reach one gallon.
Stir well to dissolve the honey completely. Add yeast nutrient according to package directions to support healthy yeast activity. Now‚ it’s time for yeast pitching. Rehydrate your chosen yeast strain according to instructions‚ then gently add it to the must;
Seal your fermentation vessel with an airlock and allow fermentation to proceed in a temperature-controlled environment. This classic recipe is a fantastic starting point for any aspiring mead maker!
Sanitization Protocol: A Detailed Guide
Sanitization is the cornerstone of successful mead making! Neglecting this step invites unwanted microorganisms that can spoil your brew. Begin by disassembling all equipment – carboys‚ airlocks‚ spoons‚ and anything contacting the mead. Use a dedicated mead sanitizer‚ following the manufacturer’s instructions precisely.
Avoid using bleach‚ as residue can harm fermentation. Submerge all items in the sanitizer for the recommended duration‚ ensuring complete coverage. Don’t rinse after sanitizing‚ unless specifically instructed by the sanitizer’s guidelines; the sanitizing solution needs to remain.
Discard any remaining sanitizer after each use. Do not reuse sanitizer! This meticulous protocol safeguards your mead‚ ensuring a clean fermentation and a delicious final product. Remember‚ sanitation isn’t optional – it’s essential.
Mixing the Must: Honey‚ Water‚ and Nutrients
Creating the “must” – the foundation of your mead – is a straightforward process. Begin with purified water‚ heated slightly to aid honey dissolution. Gradually add your chosen honey‚ stirring continuously until fully dissolved. Avoid boiling‚ as this can alter the honey’s delicate flavors.
For a one-gallon batch‚ a typical honey quantity is around three pounds‚ but adjust to your desired sweetness. Crucially‚ yeast requires nutrients to thrive. Add yeast nutrient according to package directions; this ensures a healthy fermentation.

Consider adding Fermaid O or Fermaid K for optimal results. Thoroughly mix the must to distribute the nutrients evenly. Take a hydrometer reading to establish your original gravity (OG)‚ a key metric for tracking fermentation progress.
Yeast Pitching: Activating and Adding Yeast
Proper yeast pitching is vital for a successful fermentation. Most dry mead yeasts benefit from rehydration. Gently sprinkle the yeast into a small amount of lukewarm‚ sanitized water (around 104°F/40°C) and let it sit for 15-20 minutes – do not stir! This awakens the yeast cells.
Alternatively‚ some yeasts can be directly pitched into the must‚ but rehydration is generally recommended. Once rehydrated‚ gently pour the yeast slurry into the cooled must. Ensure the must temperature is within the yeast’s recommended range‚ typically 65-75°F (18-24°C).
Oxygen is crucial at this stage‚ as it allows the yeast to multiply. Vigorously stir the must after pitching to introduce oxygen. Seal the fermentation vessel with an airlock to prevent contamination while allowing CO2 to escape.
The Fermentation Process: Monitoring and Control
Fermentation is where the magic happens‚ transforming honey into mead. Initially‚ you’ll observe vigorous bubbling from the airlock‚ indicating active fermentation. This is the yeast consuming sugars and producing alcohol and CO2. Monitor the specific gravity with a hydrometer every few days to track progress.
Primary fermentation typically lasts 2-4 weeks‚ slowing as sugar levels decrease. Once the gravity stabilizes‚ secondary fermentation begins. This phase allows the mead to clear and age‚ developing more complex flavors.
Maintain a consistent temperature within the yeast’s optimal range. Avoid drastic temperature fluctuations. Patience is key; fermentation can take months. Regular observation and gravity readings are essential for control.
Primary Fermentation: Initial Stages and Signs
The initial stage of fermentation is a flurry of activity! Within 24-72 hours of pitching the yeast‚ you should observe visible signs – bubbling in the airlock is a key indicator‚ signifying CO2 release. A foamy layer‚ known as a krausen‚ will form on the surface of the must‚ demonstrating vigorous yeast activity.
During this phase‚ the yeast diligently consumes the sugars present in the honey‚ converting them into alcohol and carbon dioxide. Regularly monitor the temperature‚ ensuring it remains within the yeast strain’s recommended range for optimal performance.
Expect this active fermentation to last anywhere from two to four weeks‚ gradually slowing as the available sugars diminish. Consistent observation is crucial during this period.
Secondary Fermentation: Clearing and Aging
As primary fermentation subsides‚ the mead enters its secondary phase – a period of clarification and maturation. This typically involves racking‚ or carefully transferring the mead off the sediment (lees) into a clean vessel‚ minimizing disturbance.
Secondary fermentation allows the mead to clear as remaining yeast and particles settle. Aging is crucial for flavor development; the longer it rests‚ the smoother and more complex the mead becomes. This stage can last from several months to years‚ depending on the desired outcome.
Maintaining a stable‚ cool temperature during aging is vital. Periodic racking can further enhance clarity. Patience is key – allowing the mead to mature unlocks its full potential!
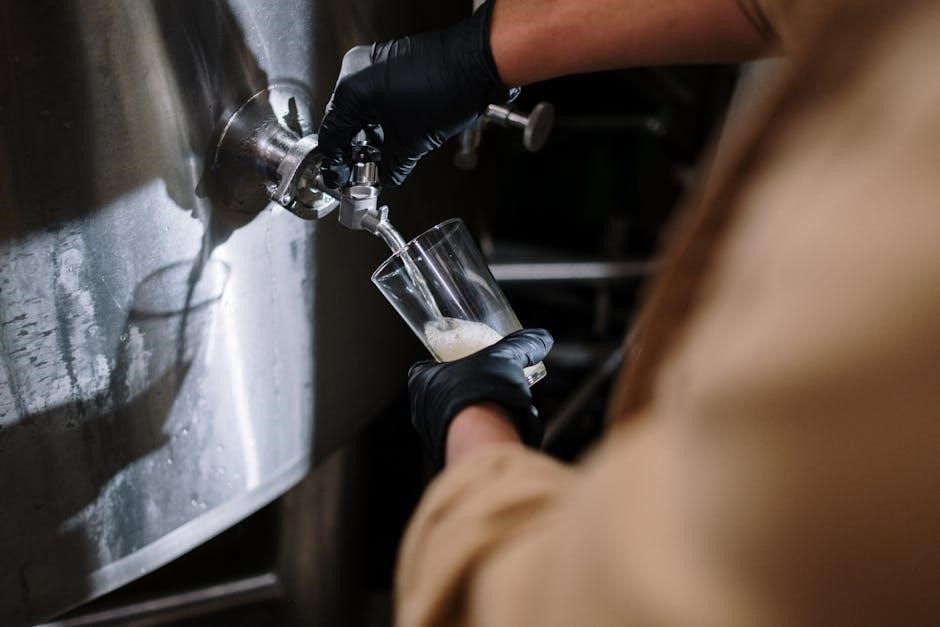
Racking and Clarification Techniques
Racking is the process of transferring mead from one vessel to another‚ leaving behind the sediment‚ known as lees‚ which consists of dead yeast cells and other particles. This crucial step clarifies the mead and prevents off-flavors. Gentle siphoning is preferred to avoid introducing oxygen.
Beyond racking‚ several techniques enhance clarity. Bentonite‚ a clay-based fining agent‚ absorbs proteins causing haze. Other options include gelatin or kieselsol‚ but these require careful use. Cold crashing – chilling the mead near freezing – encourages particles to settle.
Time is a natural clarifier; gravity does much of the work. However‚ employing these techniques speeds up the process‚ resulting in a brilliantly clear mead ready for aging and bottling.
Aging Your Mead: Time and Temperature Considerations
Aging is paramount for developing a complex and refined mead. While young mead is drinkable‚ patience unlocks its full potential. Generally‚ a minimum of six months is recommended‚ but many meads benefit from a year or more of aging.
Temperature plays a vital role. Consistent cool temperatures‚ around 55-65°F (13-18°C)‚ are ideal. Fluctuations can lead to oxidation and off-flavors. Dark storage protects against light damage.
During aging‚ flavors meld‚ harshness softens‚ and aromas evolve. Regular tasting allows you to monitor progress. Oak aging‚ using chips or spirals‚ imparts vanilla and spice notes. Proper aging transforms simple honey wine into a truly exceptional beverage.
Bottling Your Mead: Preparing for Storage
Bottling is the final step‚ preserving your mead’s flavors and carbonation. Thoroughly sanitize all bottles‚ corks‚ and bottling equipment – this prevents spoilage. Use appropriate bottles designed for carbonated beverages‚ like wine bottles.
Sweetening Options: If desired‚ backsweeten by adding honey or sugar before bottling. Stabilize with potassium sorbate and potassium metabisulfite to prevent refermentation in the bottle.
Carefully siphon the mead into bottles‚ leaving a small headspace. Cork securely‚ ensuring a tight seal. Store bottles horizontally in a cool‚ dark place. Proper bottling and storage ensure your mead ages gracefully and remains enjoyable for years to come.
Sweetening Options: Backsweetening Techniques
Backsweetening adjusts the final sweetness of your mead‚ catering to personal preference. However‚ it’s crucial to stabilize the mead before adding sugar or honey to prevent renewed fermentation in the bottle‚ leading to exploding bottles!
Stabilization is key: Add potassium sorbate and potassium metabisulfite according to package directions. These inhibit yeast reproduction. Once stabilized‚ gradually add honey or sugar‚ tasting frequently to achieve the desired sweetness.
Technique: Dissolve the sweetening agent in a small amount of mead before adding it to the batch. Gently stir to combine. Remember‚ backsweetened meads are less stable and should be refrigerated after opening.
Bottle Selection and Sanitization
Choosing the right bottles is vital for preserving your mead’s quality; Standard 750ml wine bottles are popular‚ but swing-top (Grolsch-style) bottles are convenient for their resealability. Amber or dark glass protects against light‚ preventing skunking. Ensure bottles are designed for carbonated beverages if your mead is sparkling.
Sanitization is paramount! Thoroughly clean bottles with hot water and a bottle brush‚ removing any residue. Then‚ sanitize using a no-rinse sanitizer like Star San or Iodophor‚ following the product’s instructions precisely.

Proper sanitization eliminates bacteria that could spoil your mead. Allow the sanitizer to contact all interior surfaces for the recommended time. Do not rinse unless specifically instructed by the sanitizer’s directions. A sanitized bottle is crucial for a successful final product!
Troubleshooting Common Mead Making Problems
Stuck fermentation is a frequent issue‚ often caused by insufficient yeast nutrients‚ temperature fluctuations‚ or a stressed yeast colony. Adding more yeast nutrient or gently warming the must can revive fermentation. Ensure your yeast is viable before pitching.
Off-flavors can arise from various sources. A sulfurous smell might indicate a stressed yeast; proper aeration and nutrient addition can prevent this. Acetic acid (vinegar) suggests oxidation – minimize air exposure. Brettanomyces can create barnyard-like flavors; strict sanitation is key.
Cloudiness is often harmless and clears with time‚ but persistent haze could indicate a pectin haze or bacterial contamination. Racking and clarifying agents can help. Always prioritize sanitation to avoid unwanted microbial growth and preserve your mead’s flavor!
Stuck Fermentation: Causes and Solutions
Stuck fermentation‚ a brewer’s nightmare‚ occurs when yeast activity halts prematurely‚ leaving residual sugars. Common culprits include insufficient yeast nutrients‚ particularly nitrogen‚ temperature stress – too cold or too warm – and high alcohol levels inhibiting yeast function.
To diagnose‚ check gravity readings over several days; no change indicates a stall. Solutions vary: Gently warming the must (within yeast tolerance) can revive activity. Adding more yeast nutrient‚ specifically DAP (diammonium phosphate)‚ provides essential nitrogen.
Consider re-pitching with a fresh‚ vigorous yeast strain‚ ensuring it’s appropriate for your mead’s style. Stirring the must can re-suspend yeast. Patience is vital; sometimes‚ a gentle nudge is all it needs. Thorough sanitation prevents contamination masking a true stall.
Off-Flavors: Identifying and Preventing Issues
Off-flavors can plague homemade mead‚ detracting from its delightful character. Common issues include a “sulfury” taste from stressed yeast (often remedied by aeration)‚ or a “vinegary” tang indicating acetobacter contamination – a result of oxygen exposure. A “barnyard” aroma suggests Brettanomyces‚ a wild yeast.
Prevention is key: meticulous sanitation eliminates unwanted microbes. Proper yeast nutrient levels prevent stress. Maintaining anaerobic conditions (airlocks are crucial) deters acetobacter. Identifying the flavor is the first step; online resources and tasting groups can help.
Some off-flavors mellow with aging‚ while others require corrective actions like racking off sediment or‚ in severe cases‚ discarding the batch. Careful monitoring and proactive measures yield the best results.