
Maytag Neptune Dryer Manual: Comprehensive Guide
This comprehensive guide offers expert advice for Maytag Neptune dryer repair and troubleshooting, providing step-by-step instructions to resolve common issues efficiently.
From diagnosing heating problems to replacing belts and cleaning lint filters, this manual empowers owners to maintain optimal dryer performance and extend its lifespan.
The Maytag Neptune dryer, known for its innovative design and robust performance, represents a significant advancement in laundry technology. Introduced as part of Maytag’s Neptune line, these dryers often feature moisture-sensing capabilities, designed to optimize drying times and prevent over-drying, ultimately protecting your clothes.
Understanding the intricacies of your Maytag Neptune dryer is crucial for ensuring its longevity and efficient operation. This guide serves as a comprehensive resource, offering detailed insights into its components, common issues, and effective repair procedures. Whether you’re facing a dryer that won’t start, isn’t heating, or is making unusual noises, this manual will equip you with the knowledge to diagnose and address the problem.
Regular maintenance, such as lint filter cleaning and vent inspection, is paramount to maintaining peak performance and preventing potential hazards. This guide will also cover these essential maintenance tasks, helping you keep your Maytag Neptune dryer running smoothly for years to come.

Understanding Your Dryer Model Number
Your Maytag Neptune dryer’s model number is a crucial piece of information for identifying specific parts, accessing the correct repair manuals, and ensuring compatibility when ordering replacements. Typically located on a label inside the dryer door frame or on the back panel, this alphanumeric code provides a detailed breakdown of your dryer’s specifications.
The model number isn’t just a random string of characters; it reveals vital details about the dryer’s features, manufacturing date, and specific component configurations. When seeking assistance from Maytag customer support or browsing online repair forums, having this number readily available will streamline the process and ensure you receive accurate guidance.
Accurate identification using the model number prevents ordering incorrect parts, saving you time and money. It also allows you to access tailored troubleshooting advice specific to your dryer’s unique design. Always refer to this number when researching repairs or contacting service professionals.

Troubleshooting Common Issues
Addressing problems like a dryer that won’t start, won’t heat, or makes excessive noise is crucial for maintaining functionality and preventing further damage.
Dryer Won’t Start: Power Supply Checks
If your Maytag Neptune dryer fails to power on, begin with fundamental power supply checks. First, confirm the dryer is securely plugged into a functioning electrical outlet. It’s essential to verify that the outlet itself is receiving power by testing it with another appliance.
Next, inspect your home’s circuit breaker or fuse box. A tripped breaker or blown fuse dedicated to the dryer circuit will prevent operation. Reset the breaker or replace the fuse if necessary. Remember to never replace a fuse with one of a higher amperage.
Also, examine the dryer’s power cord for any visible signs of damage, such as cuts or fraying. A damaged cord can create a safety hazard and should be replaced immediately. Finally, ensure the door switch is engaging correctly; the dryer won’t start if it doesn’t sense the door is closed.
Dryer Not Heating: Diagnosing the Problem
When your Maytag Neptune dryer isn’t heating, several components could be at fault. Begin by checking the heating element for continuity using a multimeter; a broken element won’t generate heat. If the element tests good, investigate the thermal fuse, a safety device that cuts power to the heating element if it overheats.
A blown thermal fuse indicates an underlying issue causing overheating, such as a blocked vent. Inspect and clear any obstructions in the dryer vent system. Also, examine the gas valve (for gas dryers) or the timer/control board (for electric dryers) as these control power to the heating element.
Finally, a faulty thermostat can also prevent heating. Testing these components requires caution and a basic understanding of electrical circuits; if unsure, consult a qualified technician to avoid potential hazards.
Dryer Drum Not Tumbling: Belt and Motor Issues
If your Maytag Neptune dryer drum isn’t tumbling, the most common culprit is a broken or slipped dryer belt. Accessing the belt usually involves removing the front or rear panel of the dryer. Inspect the belt for cracks, fraying, or complete breakage; replace it if damaged.
If the belt is intact but off track, reposition it onto the drum and motor pulleys. Beyond the belt, a faulty tensioner pulley can prevent proper belt tension, leading to slippage. Check the tensioner wheel for wear and replace if necessary.
Less frequently, the dryer motor itself may be the issue. A failing motor might hum but not rotate, or it may not respond at all. Motor diagnosis often requires professional assistance due to the complexity of electrical testing.
Excessive Noise During Operation
Unusual noises from your Maytag Neptune dryer often indicate mechanical issues. Squealing sounds frequently point to a worn-out belt or failing tensioner bearing and wheels, requiring replacement for smooth operation. A rumbling noise could suggest worn drum support rollers, necessitating inspection and potential replacement.
Clicking or rattling sounds might stem from objects lodged within the dryer drum or housing – thoroughly check pockets before use and inspect the lint trap area. A grinding noise could indicate a failing motor bearing, a more complex repair best handled by a qualified technician.
Before disassembling, pinpoint the noise’s origin as accurately as possible. Remember to disconnect power before any inspection or repair work to ensure safety. Addressing noises promptly prevents further damage.
Repair Procedures
Detailed instructions guide you through essential repairs, including belt replacement, tensioner adjustments, lint filter maintenance, and component testing for optimal dryer functionality.
Replacing the Dryer Belt
Begin by disconnecting the dryer from its power source for safety. Access the dryer belt by removing the front panel, typically held in place by screws or clips. Carefully note the belt’s routing around the drum, tensioner, and motor pulley before removal.
Release the tension on the tensioner to easily slip the old belt off. Install the new belt, ensuring it’s correctly seated on all pulleys, following the original routing. Re-engage the tensioner, verifying proper belt tension.
Double-check the belt alignment and secure the front panel. Before restoring power, manually rotate the drum to confirm smooth operation and proper belt tracking. A correctly installed belt ensures the drum rotates efficiently, drying clothes effectively.
Replacing the Tensioner Bearing and Wheels

Safety first: disconnect the dryer’s power supply. Access the tensioner assembly by removing the dryer’s front panel and potentially other components, like the lint duct. Locate the tensioner, typically positioned near the motor and drum.
Remove the old tensioner assembly, noting its mounting points. Install the new tensioner, ensuring the bearing and wheels are properly aligned and seated. Securely fasten the assembly with screws or bolts, tightening them to the manufacturer’s specifications.
Manually rotate the drum to verify smooth, quiet operation. A faulty tensioner can cause squealing noises and prevent proper drum rotation. Reassemble the dryer, ensuring all components are correctly positioned before restoring power.
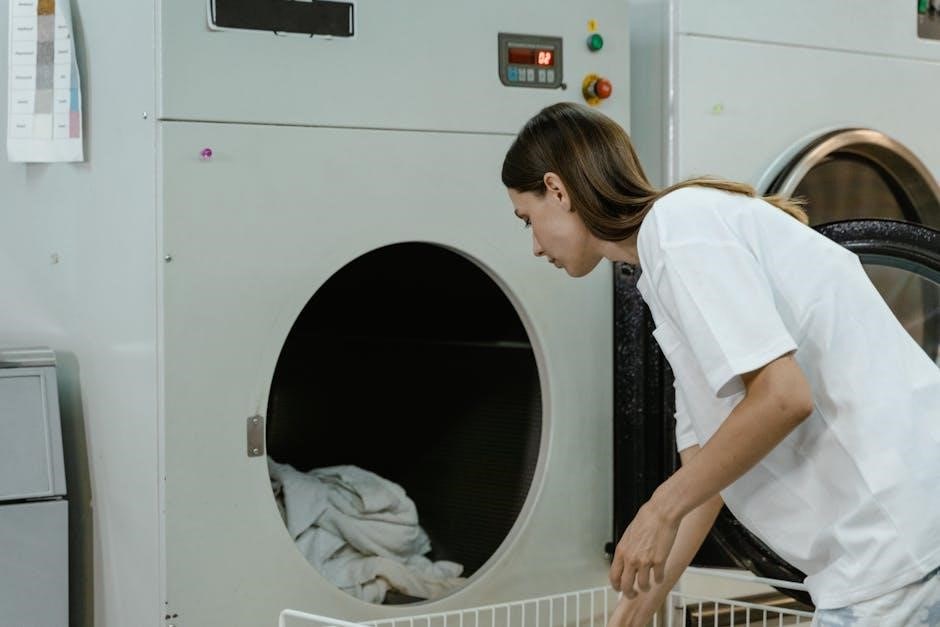
Cleaning or Replacing the Lint Filter
Maintaining a clean lint filter is crucial for dryer efficiency and safety. Locate the lint filter, usually inside the dryer’s door or on top of the drum. After each load, remove the filter and thoroughly clean it by hand, removing all accumulated lint.
For stubborn residue, especially from fabric softener, gently rinse the filter with warm water and a mild detergent. Ensure the filter is completely dry before reinstalling it. A clogged lint filter restricts airflow, increasing drying time and posing a fire hazard.
If the filter is damaged or torn, replace it immediately with a genuine Maytag replacement part. Regularly inspecting and cleaning the lint filter prevents performance issues and ensures safe operation.
Inspecting and Cleaning the Keypad Ribbon Cable
If your Maytag Neptune dryer isn’t responding to button presses, the keypad ribbon cable may be the culprit. Begin by disconnecting the dryer from the power supply for safety. Access the control panel, typically by removing screws at the rear or top of the dryer.
Carefully locate the ribbon cable connecting the keypad to the control board. Inspect it for any visible damage, such as tears or loose connections. Gently disconnect and reconnect the cable at both ends to ensure a secure fit.
If contacts appear dirty, use a soft, dry cloth to gently clean them. Avoid using liquids or abrasive cleaners. Reassemble the control panel and test the keypad functionality. If issues persist, the ribbon cable may need replacement.
Testing the Heating Element
A malfunctioning heating element is a common cause of a Maytag Neptune dryer not heating. Always disconnect power before beginning this test! Locate the heating element housing, usually at the rear of the dryer. Disconnect the wires connected to the heating element, noting their positions for reassembly.
Using a multimeter set to the ohms (Ω) setting, test the continuity of the heating element. Place the probes on the element’s terminals. A reading between 10-30 ohms indicates a functional element. An infinite reading signifies a broken element requiring replacement.
Also, check for a short to ground by testing between each terminal and the dryer’s chassis. Any continuity indicates a short, necessitating element replacement. Reconnect wires carefully if the element tests good.
Checking and Replacing the Thermal Fuse
The thermal fuse is a crucial safety component, protecting the dryer from overheating. If blown, it prevents the dryer from heating, even if the heating element is functional. Always disconnect power before proceeding! Locate the thermal fuse – typically near the exhaust vent or on the blower housing.
Using a multimeter set to continuity, test the fuse. Continuity indicates a good fuse; no continuity means it’s blown and needs replacement. A blown fuse signifies an airflow restriction or another overheating cause that must be addressed before installing a new fuse.
Remove the old fuse and install a new one with the same temperature rating. Ensure proper connections. Inspect the vent for blockages and address any airflow issues to prevent future fuse failures.

Component Overview
Key components like the motor, heating element, thermal fuse, and control board work in harmony to deliver efficient drying performance in your Maytag Neptune dryer.
Dryer Motor Functionality
The dryer motor is the powerhouse behind the tumbling action, crucial for even drying of clothes within the Maytag Neptune dryer. It receives electrical signals from the control board, initiating rotation of the drum via a belt and pulley system.
A properly functioning motor ensures consistent airflow and heat distribution. Common issues include worn motor bearings causing excessive noise, or a failing motor winding leading to a complete lack of rotation. Inspecting the motor for continuity and resistance is vital during troubleshooting.
The motor’s speed is often controlled by the control board, adjusting based on the selected drying cycle. A faulty control board can send incorrect signals, impacting motor performance. Regular maintenance, like cleaning lint buildup around the motor, can prolong its lifespan and maintain optimal efficiency.
Heating Element Specifications
The heating element within a Maytag Neptune dryer is responsible for generating the heat necessary to evaporate moisture from clothes. Typically, these elements are electric resistance coils, converting electrical energy into thermal energy.
Specifications vary slightly depending on the specific model, but generally, elements range from 240 volts and between 2000 to 3000 watts. Resistance values, when cold, usually fall between 8 to 12 ohms. A broken heating element will exhibit infinite resistance, indicating a complete failure.
Testing the element for continuity using a multimeter is a crucial diagnostic step. Always disconnect power before testing! A visual inspection can reveal physical breaks or damage. Replacement elements must match the original specifications to ensure safe and efficient operation, preventing overheating or insufficient drying.
Thermal Fuse Location and Purpose
The thermal fuse is a critical safety component within the Maytag Neptune dryer, designed to prevent overheating and potential fire hazards. It’s typically located near the exhaust vent or on the blower housing, often encased in a protective cover.
Its primary purpose is to interrupt the electrical circuit if the dryer overheats due to restricted airflow, a malfunctioning thermostat, or other issues. Once blown, the fuse must be replaced; it does not reset. Identifying the cause of the overheat is vital before installing a new fuse.
Replacing the thermal fuse without addressing the underlying problem will likely result in the new fuse blowing as well. Common causes include a clogged lint filter or vent, or a faulty thermostat. Always disconnect power before accessing or replacing this component for safety.
Control Board Diagnostics
The control board is the “brain” of the Maytag Neptune dryer, managing all functions from temperature settings to cycle selection. Diagnosing issues requires careful observation and, often, a multimeter. Start by visually inspecting the board for burnt components or damaged capacitors.
Many Neptune models display error codes, providing clues to the problem. Refer to the dryer’s technical sheet or online resources to decipher these codes. If no codes appear, carefully check the keypad ribbon cable for secure connections and cleanliness, as a faulty connection can prevent diagnostics.
Testing voltage to the heating element and motor, as directed in the service manual, can pinpoint control board failures. Replacing the control board is often a last resort, as it’s a relatively expensive component. Ensure compatibility with your specific model number before purchasing a replacement.

Safety Precautions
Always disconnect power before any repair to avoid electrical shock. Handle components with care, using proper tools, and prioritize personal safety during maintenance.
Disconnecting Power Before Repair
Before commencing any repair or maintenance procedure on your Maytag Neptune dryer, absolutely disconnect the power supply. This is a non-negotiable safety precaution to prevent severe electrical shock or potential damage to the dryer’s internal components. Locate the dryer’s power cord and unplug it from the electrical outlet.
Do not simply switch off the dryer using the control panel; physically removing the plug ensures a complete power disconnection. If the dryer is hardwired, switch off the corresponding circuit breaker in your home’s electrical panel. Verify the power is off by attempting to start the dryer – it should not respond.
This step is crucial even for seemingly simple tasks like replacing the lint filter or inspecting the heating element. Prioritizing electrical safety will protect you and ensure a successful repair process. Remember, electricity and water do not mix, so ensure the area is dry as well.
Handling Electrical Components
When working with electrical components inside your Maytag Neptune dryer, exercise extreme caution. Even after disconnecting power, some components may retain a residual charge. Avoid touching bare wires or connectors. Use insulated tools specifically designed for electrical work to minimize the risk of shock or short circuits.
If you encounter a damaged wire or connector, do not attempt to repair it yourself unless you are a qualified electrician. Replace the damaged part with a genuine Maytag replacement. When disconnecting or connecting wiring, carefully note the original configuration to ensure correct reassembly.
Always handle the control board with care, avoiding static discharge. Ground yourself before touching sensitive electronic components. If unsure about any electrical aspect of the repair, consult a professional technician to prevent further damage or personal injury.
Proper Tool Usage
Successfully repairing your Maytag Neptune dryer requires the correct tools. A multi-meter is essential for testing electrical components like the heating element and thermal fuse. Utilize a nut driver set, rather than adjustable wrenches, to prevent rounding off fastener heads. A socket set with various sizes is crucial for accessing internal parts.
A screwdriver set, including Phillips and flathead, is fundamental. Pliers, both standard and needle-nose, aid in gripping and manipulating wires and connectors. When removing panels, a panel tool or wide putty knife prevents damage to the dryer’s finish. Always wear safety glasses to protect your eyes from debris.
Ensure tools are in good working condition; damaged tools can cause further problems. Never force a tool – if it doesn’t fit easily, reassess the situation. Using the right tool for the job simplifies repairs and minimizes the risk of damaging your dryer.
Maintenance Tips
Regularly clean the lint filter after each load, inspect and clean the dryer vent annually, and avoid excessive fabric softener use for peak performance.
Regular Lint Filter Cleaning
Maintaining a clean lint filter is arguably the most crucial aspect of Maytag Neptune dryer maintenance. A clogged lint filter restricts airflow, forcing the dryer to work harder, increasing energy consumption, and potentially leading to overheating and fire hazards. It’s recommended to clean the lint filter after every single load of laundry.
Simply locate the lint filter – typically inside the dryer door or on top of the dryer cabinet – and remove it. Gently pull off the accumulated lint. For stubborn buildup, a soft brush or vacuum cleaner attachment can be used. Periodically, wash the lint filter with warm water and mild detergent to remove any fabric softener residue, as this can coat the filter and reduce its effectiveness. Ensure the filter is completely dry before reinstalling it.
Neglecting lint filter cleaning not only impacts dryer performance but also voids warranties and increases the risk of costly repairs. A clean filter ensures efficient drying, protects your dryer, and promotes safety.
Vent Cleaning for Optimal Performance
Beyond the lint filter, the dryer vent itself requires regular cleaning to maintain peak performance and safety. A blocked vent restricts airflow, mirroring the issues caused by a clogged filter – increased drying times, higher energy bills, and a potential fire hazard. It’s recommended to clean the entire vent system at least once a year, or more frequently with heavy dryer usage.
Disconnect the dryer from the power source before beginning. Detach the vent hose from both the dryer and the wall. Use a dryer vent cleaning kit, a long brush, or a vacuum cleaner with a hose attachment to remove lint buildup from the vent. Inspect the exterior vent opening to ensure it’s not blocked by debris, bird nests, or snow.
A clear vent allows moisture to escape efficiently, preventing mold growth and ensuring your dryer operates safely and effectively. Ignoring vent cleaning can lead to significant problems and costly repairs.
Avoiding Fabric Softener Buildup
While fabric softener promises softer clothes and reduced static, its consistent use can lead to a problematic buildup within your Maytag Neptune dryer. This residue coats the lint filter, diminishing its effectiveness and hindering proper airflow. A coated filter forces the dryer to work harder, increasing energy consumption and drying times, and potentially causing overheating.
To mitigate this, consider reducing your fabric softener usage or switching to dryer sheets. If you continue using liquid fabric softener, periodically clean the lint filter with warm water and a mild detergent to remove any accumulated residue. Rinsing the filter thoroughly ensures the tiny holes remain unobstructed, allowing for optimal lint capture.
Regular cleaning, coupled with mindful fabric softener application, will help maintain your dryer’s efficiency and prevent performance issues related to buildup.

Finding Parts and Resources
Locate replacement parts online through various retailers and Maytag’s official support channels. Access customer support and helpful repair forums for community assistance.
Locating Replacement Parts Online
Finding the correct replacement parts for your Maytag Neptune dryer is crucial for a successful repair. Several online retailers specialize in appliance parts, offering a wide selection specifically for Maytag models. Popular options include PartSelect, RepairClinic, and AppliancePartsPros, where you can search by model number to ensure compatibility.
When searching, always have your dryer’s complete model number readily available – this is typically found on a label inside the dryer door or on the back panel. Be sure to carefully review the part descriptions and diagrams to confirm you’re ordering the correct component.
Many of these websites also offer helpful resources like repair videos and troubleshooting guides. Consider comparing prices and shipping costs across different retailers to find the best deal. Don’t forget to check customer reviews for insights into part quality and retailer reliability.
Maytag Customer Support Contact Information
For direct assistance with your Maytag Neptune dryer, contacting Maytag Customer Support is a valuable resource. You can reach them through several channels, ensuring you find a method that suits your needs. Their official website, maytag.com, provides a comprehensive support section with FAQs, troubleshooting guides, and contact options.
To speak with a representative directly, you can call their customer service hotline at 1-800-655-7000. This line is generally available Monday through Friday, with specific hours varying. Alternatively, Maytag offers support via live chat on their website, providing real-time assistance from a trained agent.
Before contacting support, having your dryer’s model number and serial number handy will expedite the process. You can also find helpful information and submit inquiries through their online contact form.
Online Repair Forums and Communities
Beyond official support, numerous online repair forums and communities offer invaluable assistance for Maytag Neptune dryer owners tackling repairs. These platforms connect you with experienced DIYers and appliance repair professionals willing to share their knowledge and expertise.
Websites like AppliancePartsPros.com host active forums dedicated to Maytag appliances, providing a space to ask questions, share solutions, and access detailed repair guides. Similarly, RepairClinic.com features a community forum where users discuss common issues and offer troubleshooting advice.
Reddit’s r/appliancerepair subreddit is another excellent resource, fostering a collaborative environment for appliance enthusiasts. These communities often contain specific threads dedicated to the Maytag Neptune, offering targeted support. Remember to always exercise caution and verify information before attempting any repairs.